
DataScience Workbook / 05. Introduction to Programming / 5. Introduction to Julia programming language / 5.1 Julia setup: installation, environments and Jupyter integration
Introduction
Load Julia as module on HPC
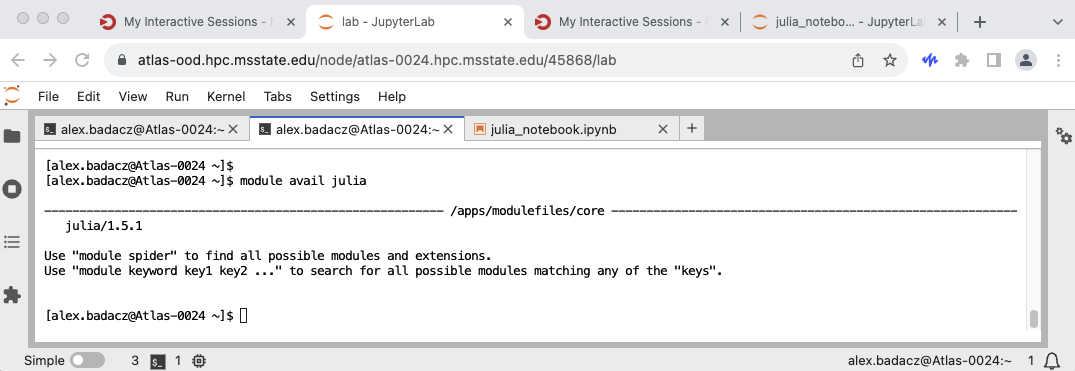
Julia, like Python or R, is often preinstalled on High Performance Computing (HPC) clusters to facilitate computational tasks. To check the available versions of Julia on the cluster, you can use the command:
module avail julia
If multiple versions are listed, you can select and load a specific version using:
module load julia/version # e.g., module load julia/1.5.1
Confirm the successful Julia activation with command:
julia --version
Then you can use Julia in your current session on the cluster.
On Atlas cluster, Julia is available as a module in version 1.5, and
on Ceres cluster, it's available in version 1.7 (October 2023).
Depending on the version compatibility with your project dependencies, you can choose the cluster that best suits your needs. If neither of these versions aligns with your project, you have the option to install a different Julia version in your user space. For detailed instructions on how to do this, refer to the section Install Julia in selected version in this tutorial.
Install Julia in selected version
- explore options for installing Julia at https://julialang.org/downloads/
RECOMMENDED ON YOUR LOCAL MACHINE
Install Julia with Juliaup - a Rust-based cross-platform Julia installer & version manager:
curl -fsSL https://install.julialang.org | sh -s -- --yes --default-channel release
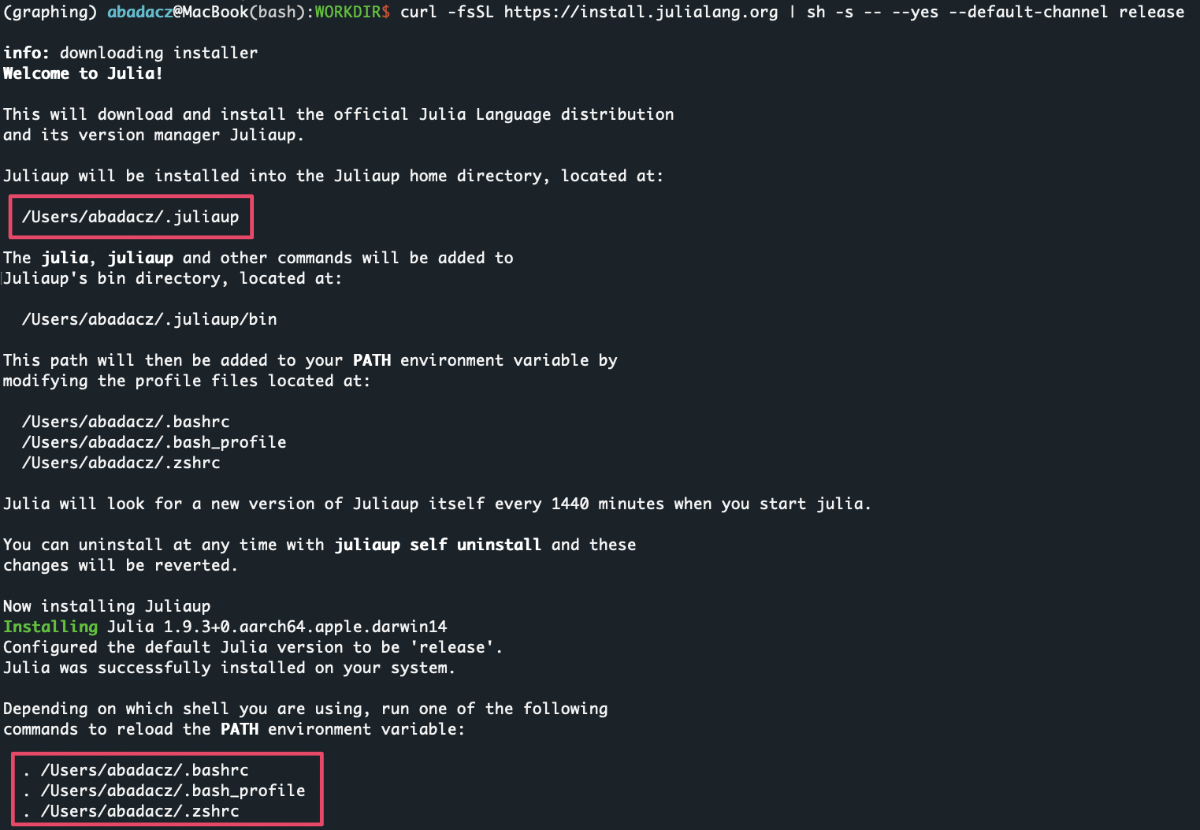
Depending on which shell you are using, run one of the following commands to reload the PATH environment variable:
. ~/.bashrc
. ~/.bash_profile
. ~/.zshrc
From now on both juliaup and julia are on the PATH. Also, the VS Code extension will also automatically find this Julia installation.
Confirm the successful installation with commands:
juliaup --help
and
julia --help
which display the usage message for each tool. You can learn about available options and usage examples. Explore the Using Juliaup section in the official documentation of the GitHub repo, to learn what you can do with juliaup.
Julia via Juliaup on HPC
You can utilize the Juliaup version manager to install Julia in your user space on the HPC, and it’s advisable to relocate and create symbolic links for the corresponding hidden directories for .julia and .juliaup from your home directory to your project location to prevent exceeding memory quota in your home directory.
Launch interactive Julia interpreter
To check the default Julia version use command:
julia --version
# julia version 1.9.3
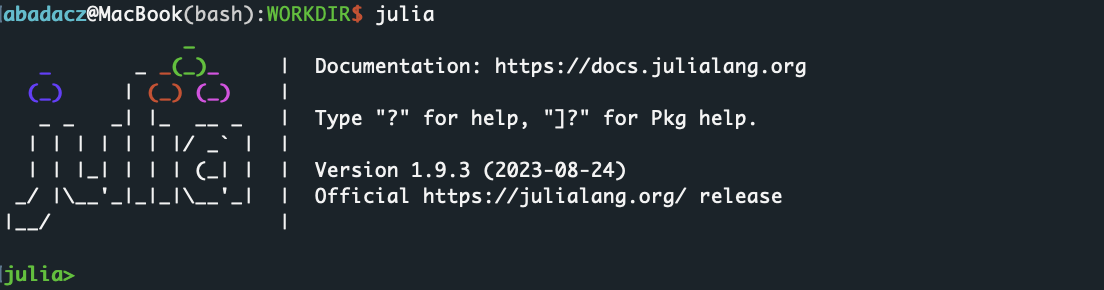
To launch the default Julia version simply run julia in your terminal:
julia
or to launch a specific Julia version, say in channel release, run:
julia +release
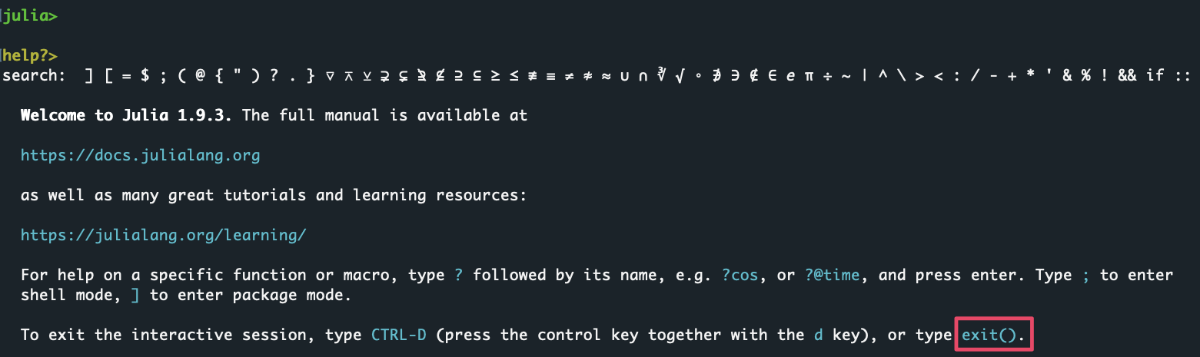
When needed, close Julia interpreter by typing exit().
The Julia interpreter is called REPL, Read-Eval-Print Loop. It is an interactive environment where you can enter Julia expressions for evaluation, see the results, and repeat this process to explore Julia code in a live, iterative manner.
Get basic inline help
Once in the interactive Julia interpreter, type ? and press enter. This will automatically change your julia prompt into help? and print on the screen the info about the documentation and basic instructions about the syntax and detailed help for options.
julia> ?
NOTE: For help on a specific function or macro, type ? followed by its name, e.g. ?cos, or ?@time, and press enter.
Julia package manager
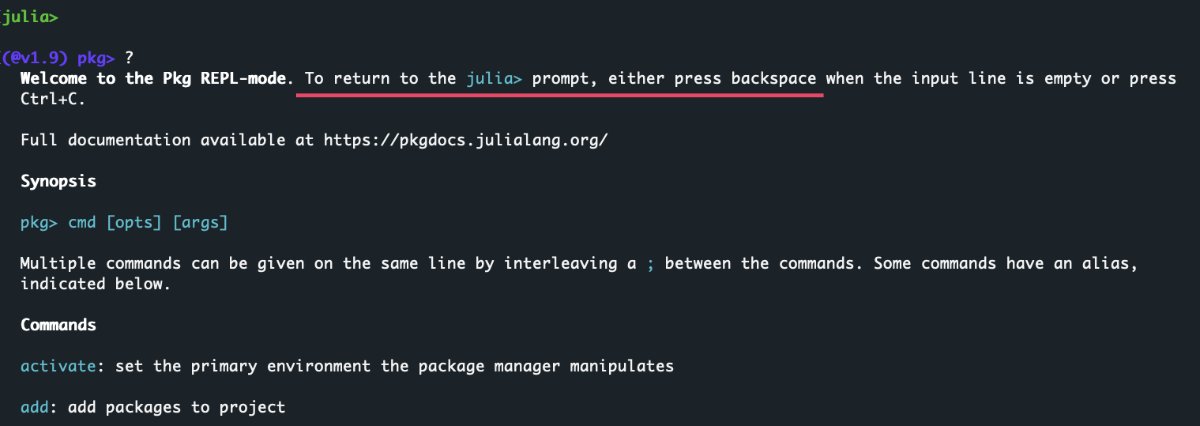
In the Julia REPL, type ] to enter the package manager mode. This will automatically switch the julia> prompt into the (@v1.9) pkg> built-in package manager mode.
julia> ]
(@v1.9) pkg>
- To return to
julia>prompt, pressbackspace,deleteorctrl C.
Then you can learn more about the built-in Julia package manager using the ? followed by pressing enter:
(@v1.9) pkg> ?
Further, you can get more detailed help on various commands, for example:
(@v1.9) pkg> ?generate

See the full list of commands
Full documentation available at https://pkgdocs.julialang.org/
Synopsis
pkg> cmd [opts] [args]
Multiple commands can be given on the same line by interleaving a ; between the commands. Some commands have an alias, indicated below.
Commands:
activate: set the primary environment the package manager manipulates
add: add packages to project
build: run the build script for packages
compat: edit compat entries in the current Project and re-resolve
develop, dev: clone the full package repo locally for development
free: undoes a pin, develop, or stops tracking a repo<br gc: garbage collect packages not used for a significant time
generate: generate files for a new project
help, ?: show this message
instantiate: downloads all the dependencies for the project
pin: pins the version of packages
precompile: precompile all the project dependencies
redo: redo the latest change to the active project
remove, rm: remove packages from project or manifest
resolve: resolves to update the manifest from changes in dependencies of developed packages
status, st: summarize contents of and changes to environment
test: run tests for packages
undo: undo the latest change to the active project
update, up: update packages in manifest
why: shows why a package is in the manifest
registry add: add package registries
registry remove, rm: remove package registries
registry status, st: information about installed registries
registry update, up: update package registries
Install Packages system-wide
Once you launch REPL with a julia keyword you will enter the default Julia environment. The default environment is typically the @v#.# environment, where #.# corresponds to the version of Julia that you are using. For example, for Julia version 1.9, the default environment would be @v1.9.
In this default environment, you have access to all the packages that have been installed system-wide for your user account. It acts as a base environment where you can access common packages and utilities. Any packages installed in this environment are available across all other environments unless a different version of the same package is specified in another environment.
To install additional packages to your default Julia environment, enter the package manager mode with ]:
julia> ]
and then use the add command to install packages.
For example, to install the package “CSV”, you would type:
(@v1.9) pkg> add CSV
or to install a specific version of a package:
(@v1.9) pkg> add CSV@v0.10.11
You can also add (install) multiple packages with a single add command in Julia:
(@v1.9) pkg> add DataFrames@v1.6.1 DelimitedFiles@v1.9.1 ProgressBars@v1.5.1
Create isolated environment
Creating a virtual environment in Julia is slightly different compared to languages like Python. In Julia, the term for a virtual environment is a “project”. Each project has its own set of dependencies, which are managed through a Project.toml file, and optionally a Manifest.toml file.
It's beneficial to have a centralized location for all your Julia Projects, i.e., isolated environments, instead of creating each environment in a different location alongside specific projects. Centralizing your Julia environments facilitates easier management, backup, and sharing of environments, while also ensuring a consistent and organized structure, which simplifies the process of finding and activating environments as you switch between different projects.
-
Open terminal and navigate to the location where you want to store your isolated environments for Julia.
You can create a JULIA_ENVS directory in your/project/working space on a cluster and house all your Julia environments there with meaningful names. When a particular environment is needed, you can easily activate it from this centralized path, or create symbolic links (softlinks) to the corresponding project location if you prefer to keep them together with your data and scripts. - Launch a Julia interactive interpreter in a terminal:
julia -
Type
]to enter the package manager mode.
Note that the prompt changed from julia> to something like (@v1.9) pkg>. - Create a new project by running the command
generate YourProjectName, replacing “YourProjectName” with the name you want to give to your project.(@v1.9) pkg> generate julia_geoThis will create a new directory named julia_geo with a Project.toml file in it.
- Activate the Project (i.e. the environment). Still in the package manager mode, navigate to the project directory and activate the project by running the command:
(@v1.9) pkg> activate ./julia_geo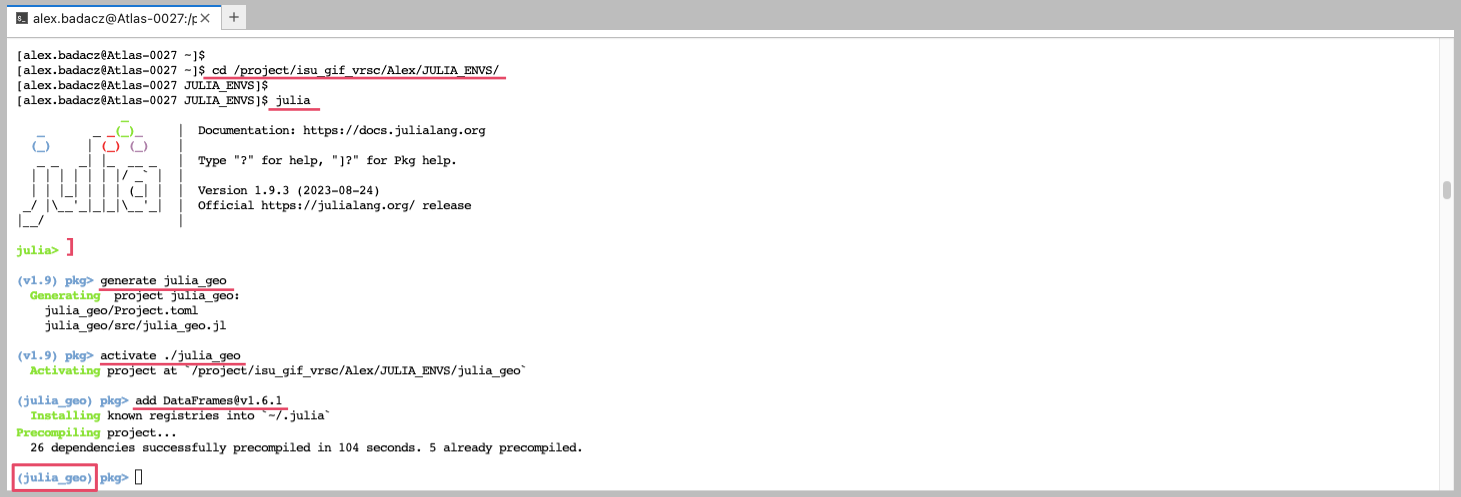
Once you activate the environment, the prompt will change to display the name of the active environment (e.g., julia_geo), indicating that you are now working within this specific environment. - Install Packages in the new environment. With your new environment activated, you can now install packages using the
addcommand:(julia_geo) pkg> add Geodesyor to install a specific version of a package:
(julia_geo) pkg> add Geodesy@v1.1.0You can also add (install) multiple packages with a single add command in Julia:
(julia_geo) pkg> add ImageMagick@v1.3.0 Images@v0.26.0 CairoMakie@v0.10.9 - Deactivate the Project, i.e. the specific environment, and return to the default environment:
(julia_geo) pkg> activateNow you are back in the default environment (@v1.9 in this example) and can access all the packages installed there.
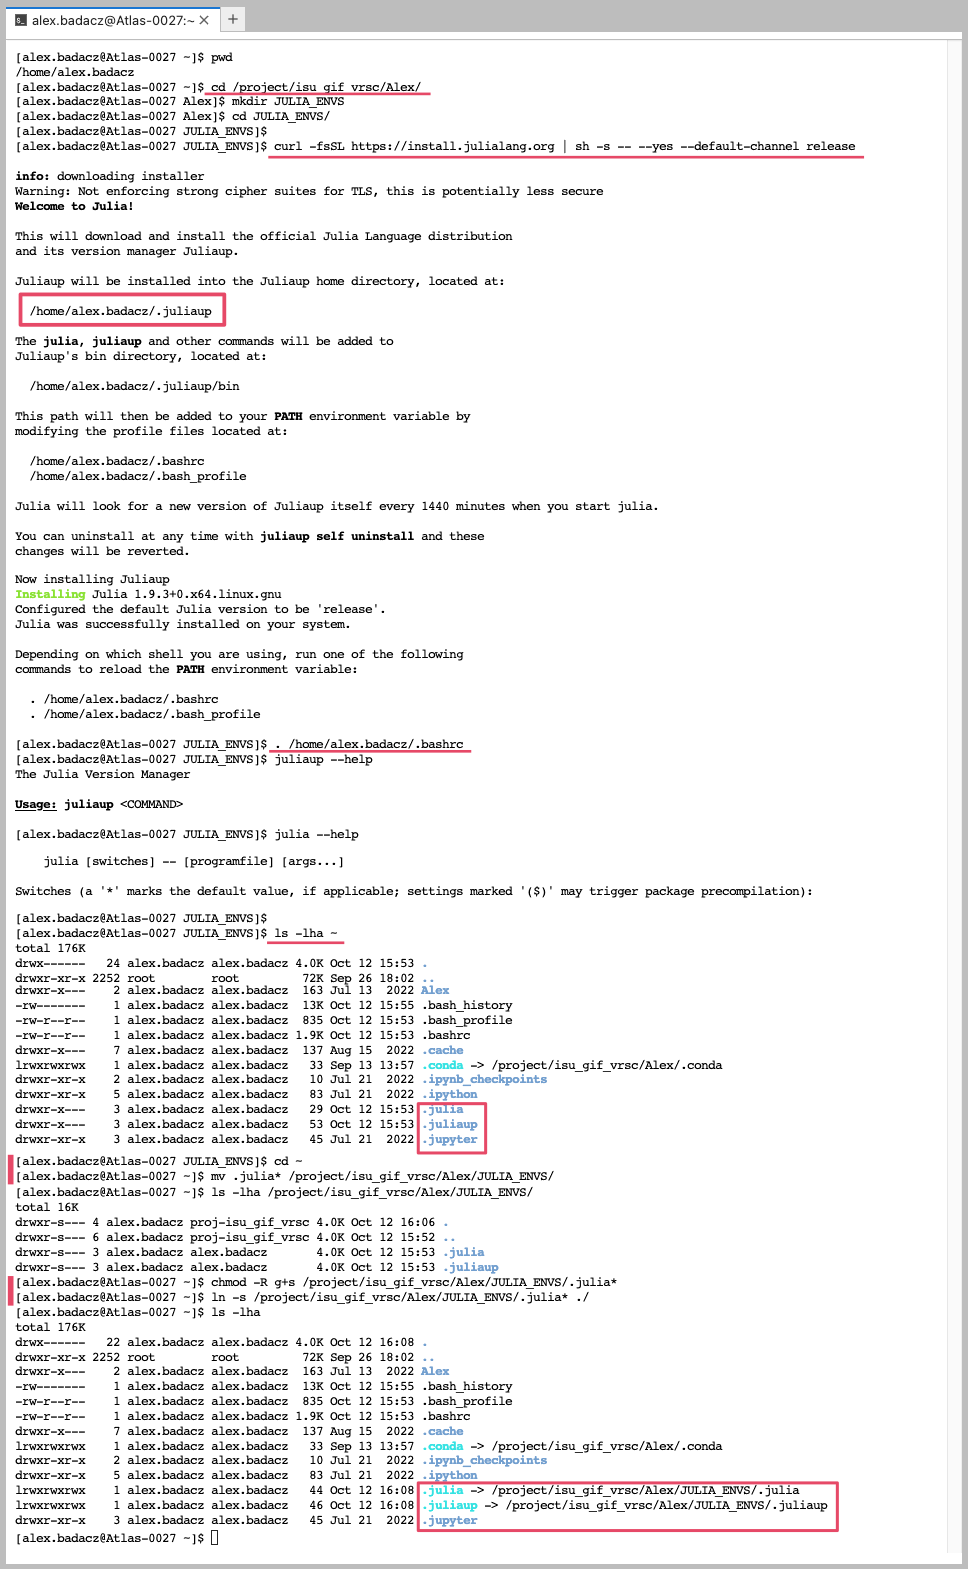
Move .julia from home to project on HPC
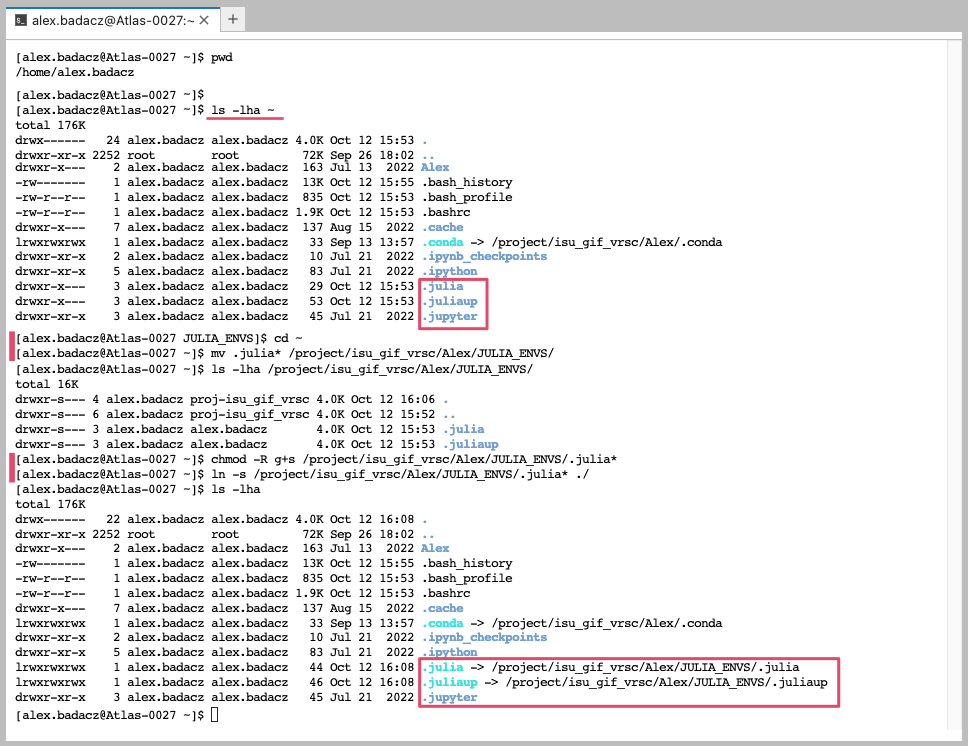
When you set up Julia on the HPC infrastructure for the first time, remember to relocate the .julia hidden folder from your home to the storage space without limited memory quota (e.g., on SCINET clusters it can be the /project/ path). Then soft link them back to the /home/user.name directory to make them accessible from this default location.
NOTE: The .julia hidden folder may not appear immediately after loading a Julia module, but it will definitely be created once you install some Julia libraries. To verify the presence of the .julia directory in your home, utilize the command:
ls -lha ~
cd ~
mkdir /project/<your_project_dir>/<account_name>
mv .julia* /project/<your_project_dir>/<account_name>/
chmod -R g+s /project/<your_project_dir>/<account_name>/.julia*
ln -s /project/<your_project_dir>/<account_name>/.julia* ./
Julia in Jupyter Lab
Julia is not natively available in Jupyter Lab upon a fresh installation. However, you can easily add Julia to Jupyter Lab through the IJulia package, which serves as a Julia-language backend for the Jupyter interactive environment.
Install IJulia
- First, ensure you have Julia installed on your machine.
- In the terminal, launch the built-in interactive interpreter (REPL) for Julia:
julia - In the Julia REPL, run the following command to install the
IJuliapackage:using Pkg Pkg.add("IJulia")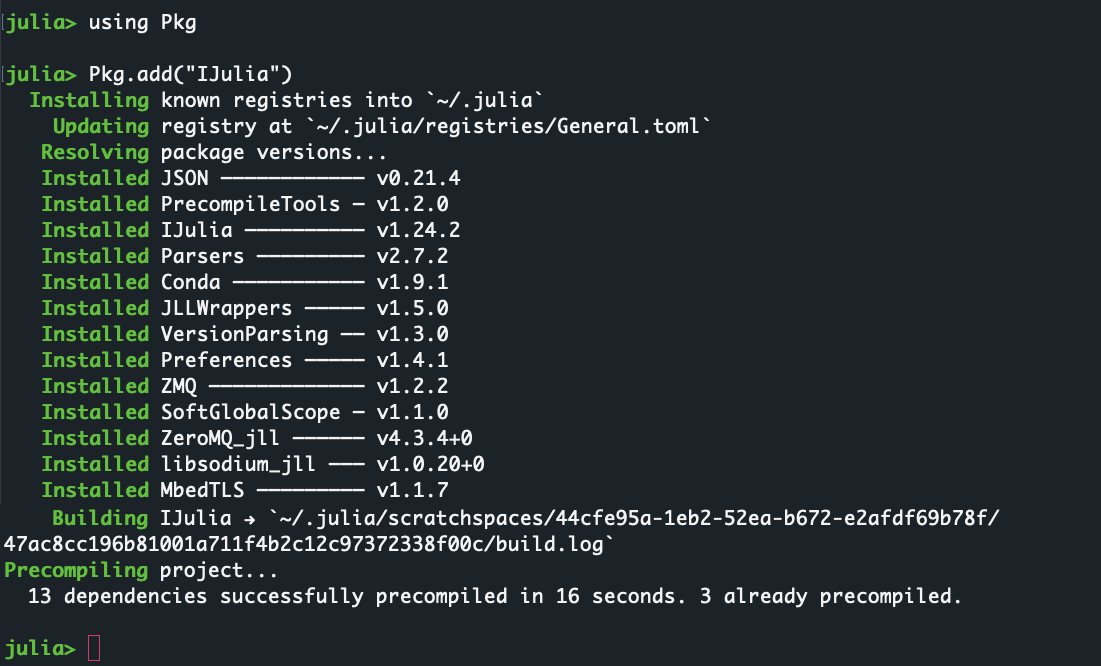
If you install IJulia in the base environment, you'll obtain a universal Julia kernel in Jupyter Lab, which can be paired with any custom environment created later. To utilize a custom environment with this universal kernel, simply activate the desired environment within a notebook (follow the steps provided below).
Once IJulia is installed, you can launch Jupyter Lab (assuming you have it installed).
Access Julia in Jupyter Lab
A. Launch Jupyter Lab installed on HPC via OOD
JupyterLab is accessible on SCINet clusters via the Open On Demand service, allowing users to launch it directly in a web browser on any device with a graphical interface.
Navigate to the specified URL:
enter your login credentials, and select JupyterLab from the Interactive Apps menu bar, you can seamlessly access and work in a JupyterLab environment on the SCINet clusters.
B. Launch Jupyter Lab installed on your local machine
In the separate terminal tab, navigate to the desired location in your file system and launch the Jupyter Lab:
(assuming you have it installed)
jupyter lab
The Jupyter Lab session should start automatically in your default web browser. If not, just do it manually navigating to the URL http://localhost:8888/.

In Jupyter Lab, you should now see Julia as an available kernel, which allows you to run Julia code within Jupyter notebooks, Julia console and create Julia Files.
To open a new instance of a selected app, such as a Julia-based notebook, navigate to the Launcher in JupyterLab and click on the Julia kernel.
Activate an Isolated Environment
When it comes to working in isolated environments with specific dependencies, you can switch to any environment you want within a single notebook by running the Pkg.activate() command with the path to the desired environment. This method is quick and easy, and allows you to manage your environments directly within your Jupyter notebooks.
In a Jupyter notebook with the basic Julia kernel, you can run the following Julia code to activate a specific environment:
using Pkg
Pkg.activate("/path/to/your/environment")
If you decided to create a unified storage location for your Julia environments, e.g. JULIA_ENVS, the path should look like
/project/account/user.name/JULIA_ENVS/env_name.
In the JupyterLab interface, you can check the location of your notebook using the file browser on the top left, and specify the relative or absolute path to the custom Julia environment.
Press alt + enter or option + return (on Mac) to activate your custom project (env).
In the following cells in the notebook, you can test your Julia code.

To create a new kernel for each environment, you would typically create a new IJulia kernel specification file that points to the desired environment. This can be a bit more complex and requires some additional setup compared to the method showed above.
It is recommended to create a single Julia kernel in the base environment with system-wide installed libraries, and then activate more specific environments as needed within individual Jupyter notebooks.