
DataScience Workbook / 04. Development Environment / 1. Integrated & Interactive Development Environment (IDE) / 1.2 Jupyter: Interactive Web-Based Multi-Kernel DE
Introduction
JupyterLab Development Environment
interactive web-based computing interface
![]()
Introduction to Project Jupyter
Jupyter (https://jupyter.org) is an open-source project started in 2014 to support interactive scientific computing. Now it also facilitates easy sharing of the visual conclusions of the analytical results.
The Jupyter interface has a form of a web application, providing the Graphical User Interface (GUI) via localhost in any web browser. It is also universal in terms of preferred programming languages, including Python, Java, R, Julia, Matlab, Octave, Scheme, Processing, and Scala, which sum up to nearly 100 kernels �.
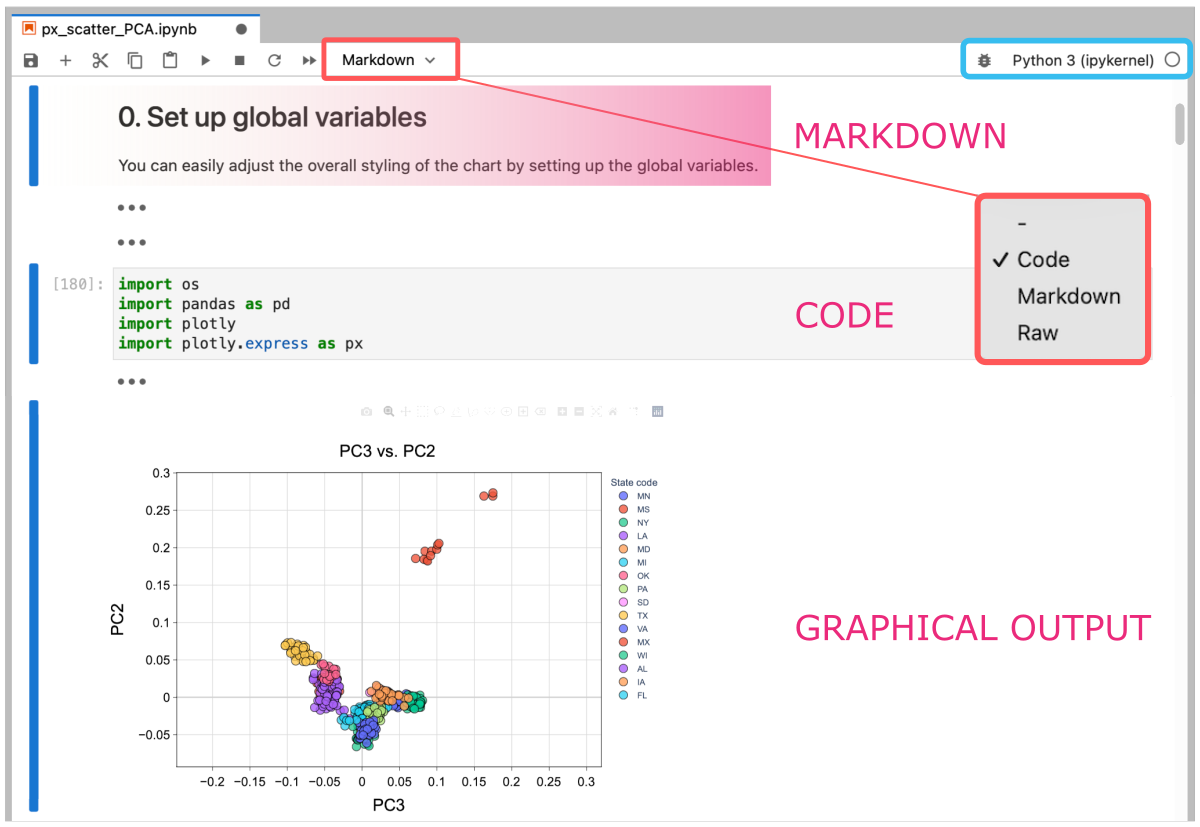
The entire computing pipeline, combining sections of:
- executive code cells,
- rich-text descriptions and comments,
- and graphical visualizations of analytical conclusions,
can all be saved into a single notebook file. This file also caches the kernel for the selected programming language and other settings. That makes the development environment easily transferable among various computing machines and contributors. Note that the Jupyter notebook format is recognized and rendered by GitHub, making it human-readable and thus greatly benefiting day-to-day usability.
In a word, it is worth to start using Jupyter, especially at the stage of final parsing of results and data visualization, also interactive ones.
JupyterLab vs. Notebook
There are several distributions of Jupyter interface:
- Jupyter Notebook
- JupyterLab
- JupyterHub
The first two are mainly dedicated for individual usage, while JupyterHub is a multi-user version designed for simultaneous teamwork with a centralized deployment.
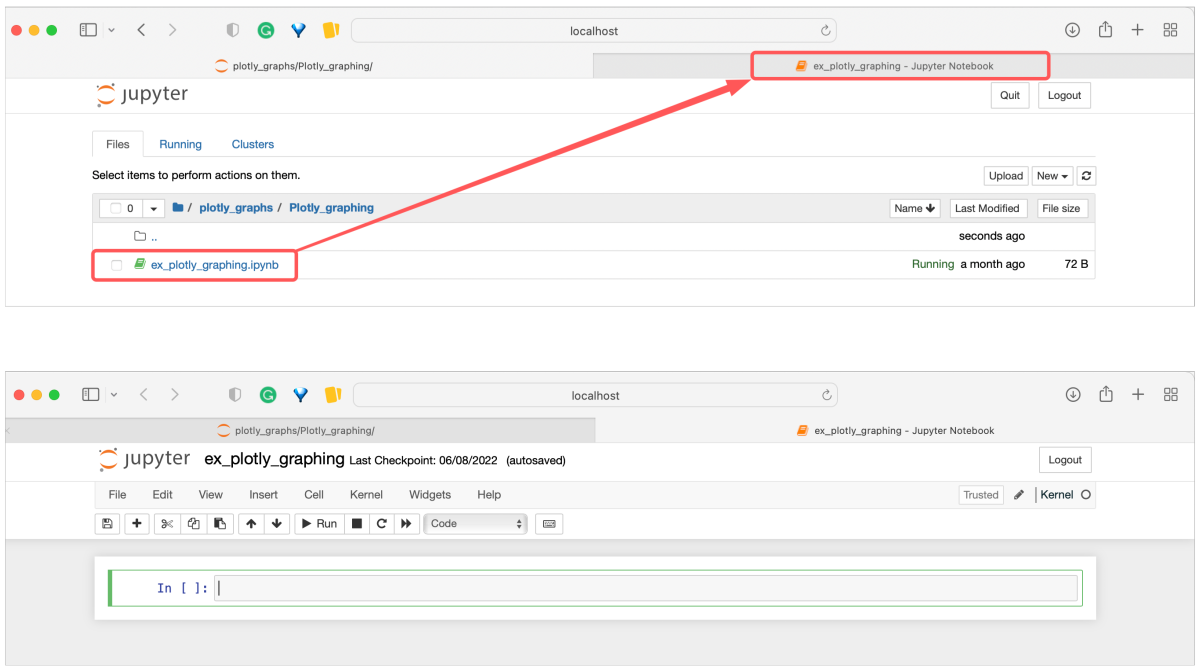
Jupyter Notebook is a simple interface intended for editing a single document. All other files (e.g., for input previews) will open in separate web browser tabs. This variant of the interface has limited capabilities to render certain data types (e.g., CSV) as human-readable. Still, it is a good starting point for beginners or users who occasionally review notebooks received from others.
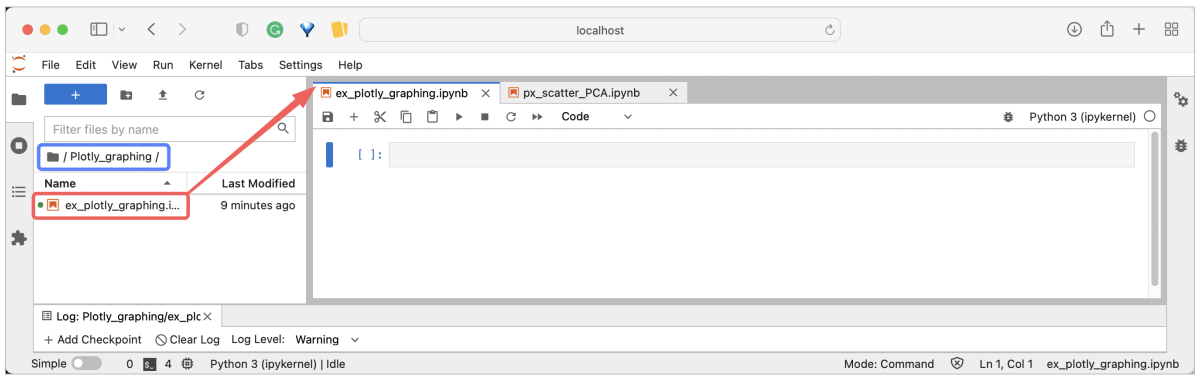
JupyterLab is a more advanced interface providing some functionality of the integrated development environment (IDE). That includes the convenience of a built-in file system viewer and wide developer section, where the selected files open as separate sub-tabs or customized compartments, all in the same browser tab. The display of various file types (HTML, Markdown, CSV, etc.) is clearly improved. This distribution is well suited for developers and daily-based users, especially those working with analysis summaries and visualizations.
Note, that both Jupyter variants can coexist on the same computing machine, and the files generated on them are fully compatible.
Voilà is an extension that turns notebooks into standalone web applications stripping out the input cells and source code. So the rendered notebook contains only visualizations of the results, e.g., tables or graphs, that can be changed by the user using interactive widgets.
Learn more from the Voilà GitHub repo: https://github.com/voila-dashboards/voila
Installing Jupyter
Jupyter’s tools are available in the Python Package Index (PyPI, https://pypi.org), the repository of software for the Python programming language.
Installation
You can easily install jupyter on your local computing machine in the variant of your choice (lab, notebook) or both. You can do a global installation in the default Unix environment or create a virtual environment with Conda (see the Basic Developer Libraries tutorial in section 03. Setting Up Computing Machine of the Workbook) to add more modules specific to your analysis later. Regardless of the chosen environment, the installation is straightforward when using pip.
pip install jupyterlab
or (and)
pip install notebook
Launching Jupyter
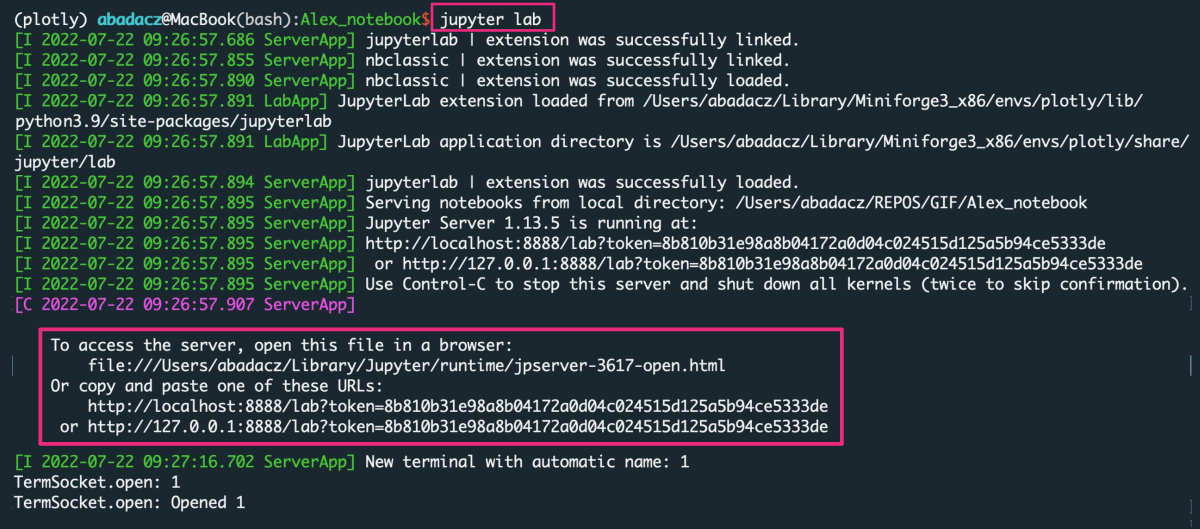
Launching the jupyter web application is also effortless, you just simply type jupyter lab or jupyter notebook in the terminal (choose correctly for the installed variant). After approving the command with enter key (return on mac), a new window of your default web browser will automatically open along with the jupyter GUI.
- JupyterLab
Once installed, you can start it from the command line by typing:
jupyter lab
That will open your Jupyter session in a web browser on localhost with a default URL: http://localhost:8889/lab.
- Jupyter Notebook
Once installed, you can start it from the command line by typing:
jupyter notebook
That will open your Jupyter session in a web browser on localhost with a default URL: http://localhost:8888/tree.
If you accidentally close a browser window with the active Jupyter interface to reopen it, manually copy-paste the URL displayed in the terminal into the new web browser instance.
Jupyter via Open OnDemand
Open OnDemand (OOD) is an interactive interface to remote computing resources such as SCINet infrastructure or other HPC clusters. Figuratively speaking, OOD creates a graphical user interface using a web browser window to provide the user interactive access to HPC infrastructure. In a nutshell, it serves a desktop to a file system on a cluster, visible to the user and managed in a web browser window. Actually, the desktop is one of the interactive applications available through the OOD service. In general, programs available via the OOD service operate based on graphical visualization, which is impossible directly in the terminal on a remote machine. These are, for example, programs for geospatial analysis or RStudio and Jupyter, which provide the opportunity to graphically present the analyses, managed commonly in R and Python.
Having that software on a cluster with interactive visual access through the OOD service allows you to work with data directly without copying it to a local machine (which could be beyond its capacity with big data).
The good news is that you do NOT have to install anything yourself!
The OOD service is managed by the admins of specific HPC infrastructure. Also, the programs available through the OOD are installed and updated by them. You just need to log into the system in your browser and set up your interactive session.
Jupyter via SCINet OOD
SCINet is a Scientific Computing Network combining high-performance computing (HPC) infrastructure (Atlas cluster, Ceres cluster, Juno storage), professional training, and improvement of collaborative network among USDA researchers. To access these resources you must be an ARS-related (or sponsored) scientist and apply for a SCINet account in advance. Both clusters, Atlas and Ceres, currently have an OOD service in operation.
Jupyter on ATLAS
Access the Atlas OOD login web page at: https://atlas-ood.hpc.msstate.edu/
Follow the Atlas Open OnDemand Guide at hpc.msstate.edu
Jupyter on Ceres
Access the Ceres OOD login web page at: http://ceres-ood.scinet.usda.gov/
Follow the Ceres Open OnDemand Guide at scinet.usda.gov
Further Reading
- 1.2.1 Getting Started with JupyterLab on a local machine
- 1.2.2 Getting Started with Jupyter Notebook on HPC systems
-
1.2.3 Sharing Jupyter-based reproducible pipline via MyBinder
- 2. Python programming environment(s)
- 3. R programming environment(s)