Introduction
| VSCode is an editor made for coding and debugging. It supports multiple programming languages and includes features such as syntax highlighting, autocomplete, and debugging tools. In addition to its powerful editing capabilities, VSCode also offers integrated support for Git, the popular version control system. This allows user to manage code and collaborate with other team members. In this tutorial, I will get you started with using Visual Studio Code and using some of its useful features. |
|
Installation
VSCode can be downloaded from VSCode website ⤴. Once the download is complete, run the installer to install VSCode on your system and run the application once installed.
Shortcuts
The most useful shortcut you need to learn is Ctrl+Shift+p (or Cmd+Shift+p on mac) which opens the search bar for all commands. You can search for all available commands and their shortcuts. Some commands do not have shortcuts but can still be selected from this search bar. Open Keyboard Shortcuts with Ctrl+k Ctrl+s to get the whole list and configure/add shortcut keys to commands you use. Below is a list of some useful default shortcuts and the commands on windows (change Ctrl with Cmd on mac):
| Shortcut | Command |
|---|---|
Ctrl+k Ctrl+r |
Keyboard shortcuts reference |
Ctrl+k v |
Open markdown preview to the side |
Ctrl+Shift+v |
Open Markdown preview |
Shift+Alt+c |
Copy path of active file |
Ctrl+s |
File: Save |
Ctrl+Shift+s |
File: Save as.. |
Ctrl+Shift+f |
Search |
Ctrl+Shift+g |
Source Control |
Ctrl+ |
Terminal |
Ctrl+Shift+ |
New Terminal |
Ctrl+Shift+y |
Debug Console |
Ctrl+Shift+u |
Output |
F5 |
Start Debugging |
Ctrl+F5 |
Run without Debugging |
Ctrl+k Ctrl+t |
Change Theme |
Using a web browser, log in to your Github, go to your repository and press the period . key. You can now use VSCode in the browser (without installing VSCode).
Select a Theme
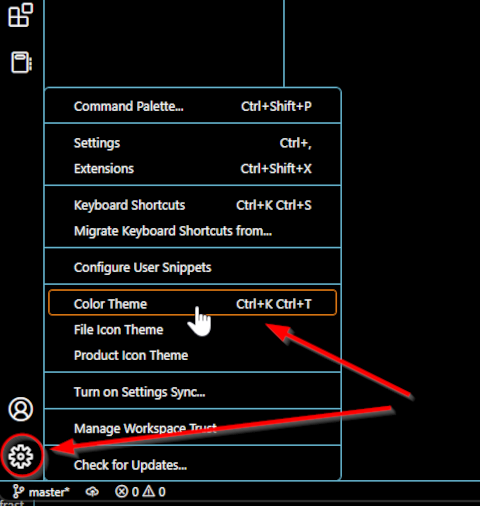
VSCode has several inbuilt color themes (dark and light background) which can be selected by pressing Ctrl+k Ctrl+t shortcut keys or from the ‘Manage’ icon at lower left corner. A list of theme options will open up and you can select the one you like. I am using Dark High Contrast theme for pictures in this tutorial.
Open a Project
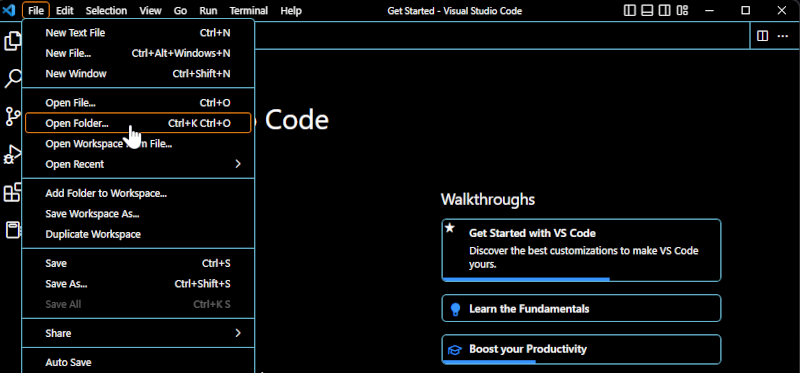
To open a project, go to File menu and select the Open Folder option. Select the folder containing your project files.
The project folder, subfolders and files appear in the Explorer pane on the left side of the editor.
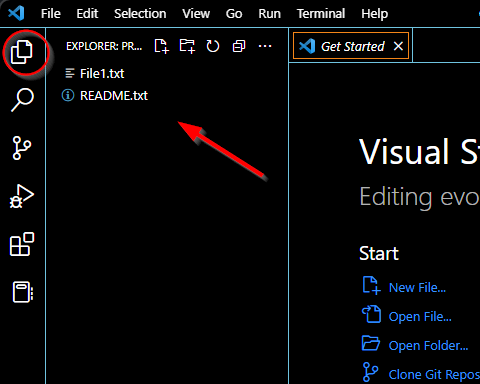
You can select a file from the opened folder, or create a new file.
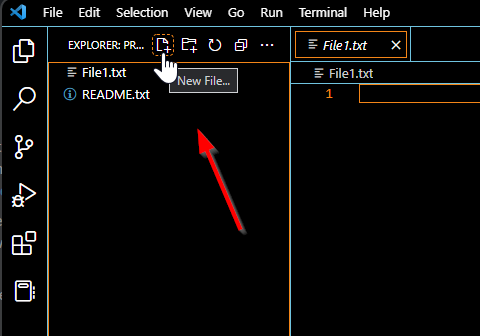
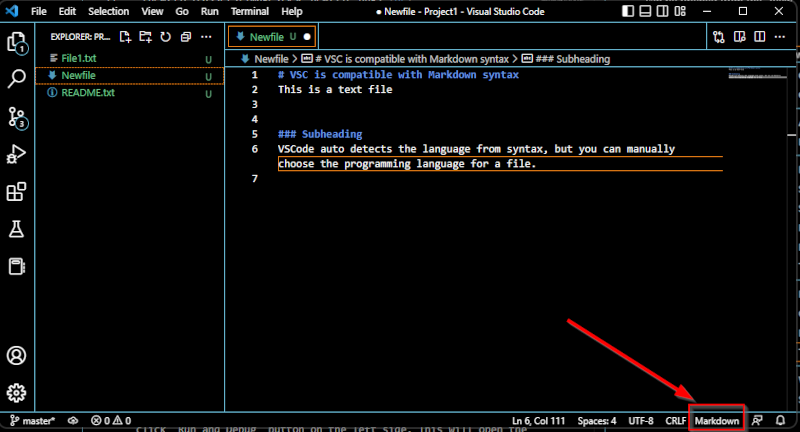
A new file opens up and you can start writing in it. VSCode is Markdown compatible. Check out the page to learn more about Markdown. VSCode supports multiple programming languages such as Python, R, Java, C++, JavaScript etc.
Check out the official documentation ⤴ about programming language support and download the extensions for language(s) of your choice. When you open a file, VSCode detects the language used automatically, but you can also manually change the language mode from lower right corner or by using Ctrl+k m shortcut keys.
Terminal
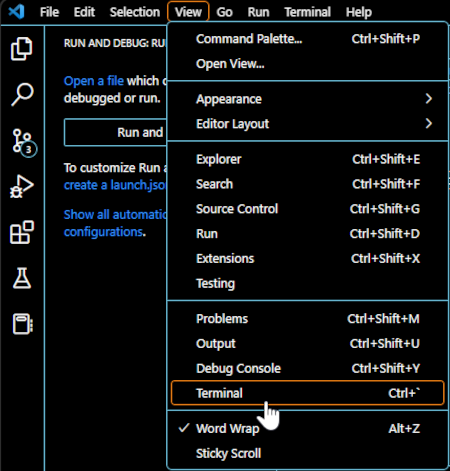
The integrated terminal allows you to run command-line tools and scripts directly within the editor. If the terminal does not appear automatically at the bottom of the editor, it can be opened from the “View” menu and selecting “Terminal” or using the ctrl+` shortcut keys.
Debugging
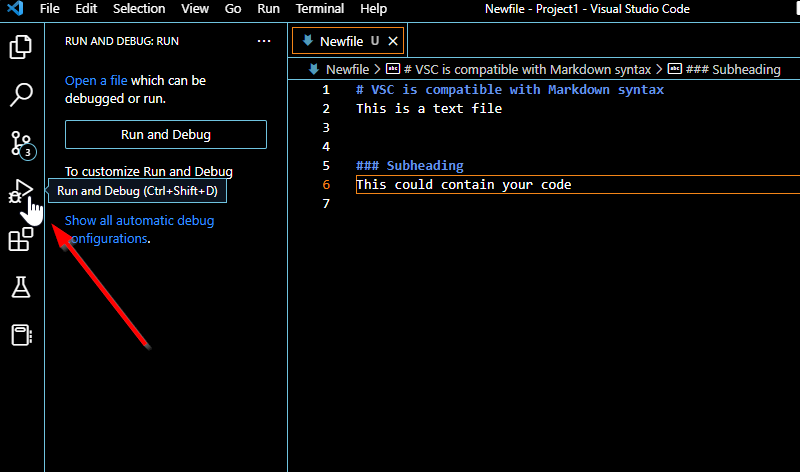
VSCode has powerful tools to help you find and fix errors in your code. To start debugging, open the file containing the code, click Run and Debug button on the left side. This will open the Debug pane that lets you configure your debug settings and start the process.
Version Control
If you are not familiar with Git, check out these tutorials about and . It is possible to work with Git repositories directly from the VSC editor. You will need to log in to your GitHub account the first time you use Git. To log in, select Remote Explorer icon from left-hand taskbar.
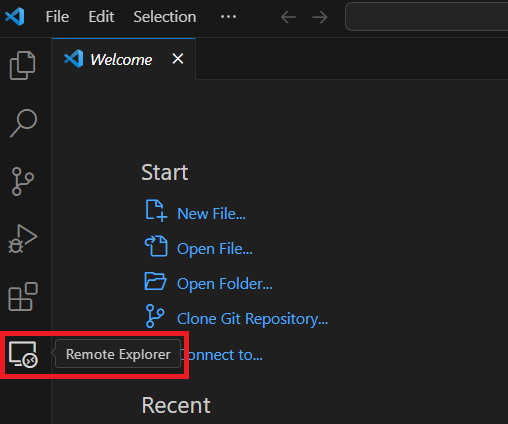
Select Sign in to GitHub (you may need to let the page load a little before the sign in button appears). If your system asks The extension GitHub Codespaces wants to sign in using GitHub. then select allow. You will be directed to the GitHub login webpage. Select Authorize Visual-Studio-Code to connect your GitHub account to VSCode.
You can clone a repo, or initialize a repo for your project from the terminal. Source Control pane on the left is used to manage your Git repositories. You will need to log in to your GitHub account the first time you use Git. The common Git operations such as Pull, Push, Clone, Commit, and Create Branch can be performed from here. Check this page for a list of Git commands on VSCode.
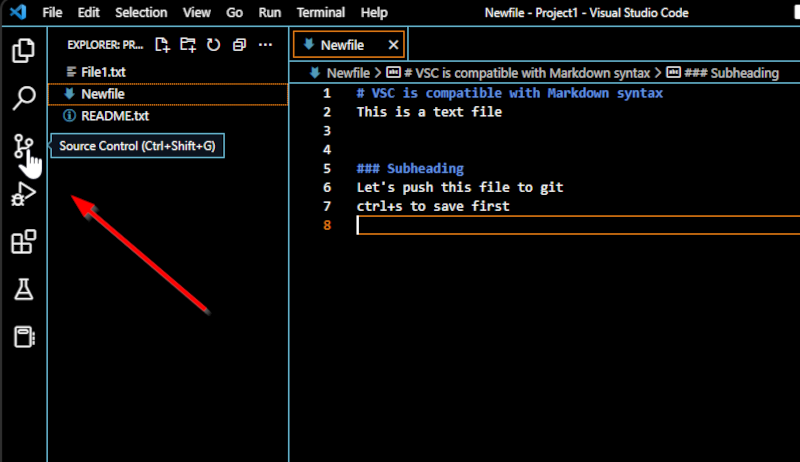
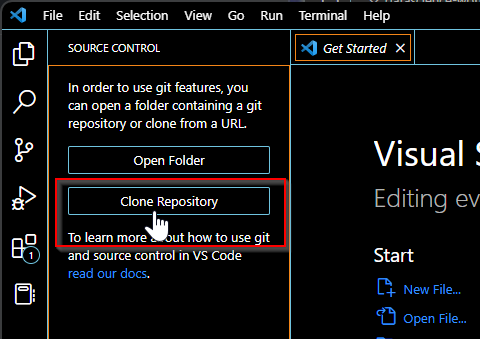
You can clone an existing repo after clicking Source Control, if you have no files/folders open the following option appears:
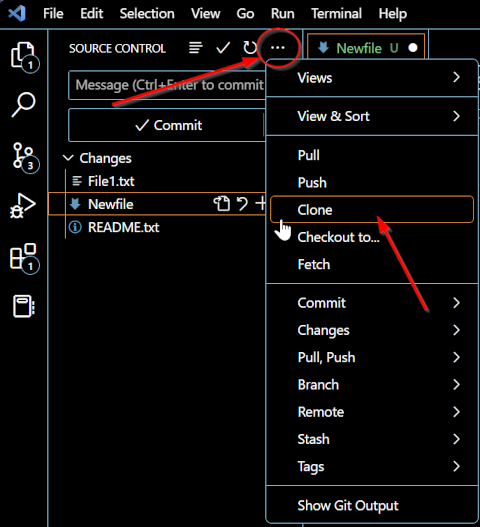
If you have something open already, you can still clone from ... options drop down menu.
Another option is to use the shortcut to find all commands mentioned earlier, Ctrl+Shift+p and search for Git Clone. Alternatively, you can always use the Terminal within VSCode to perform functions like Clone.
git clone <Github Repo> <Local Directory>
If you open a new file or folder from your local computer which is not a cloned Git repo, VSC will give you an option to initialize the repository in Source Control.
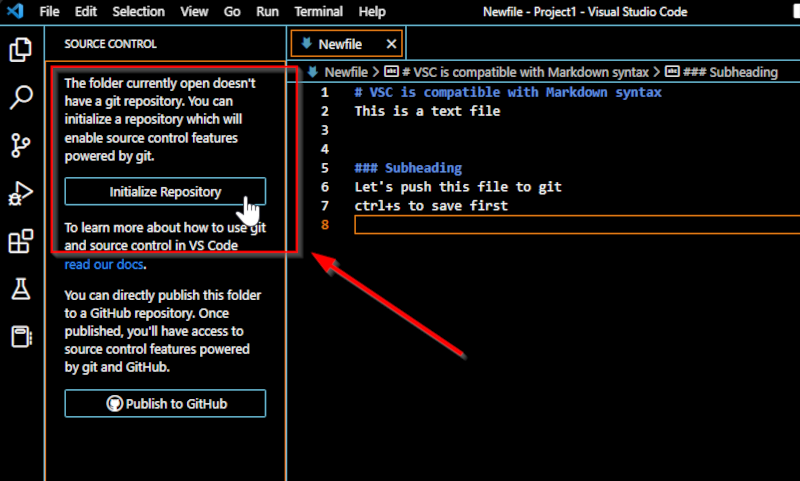
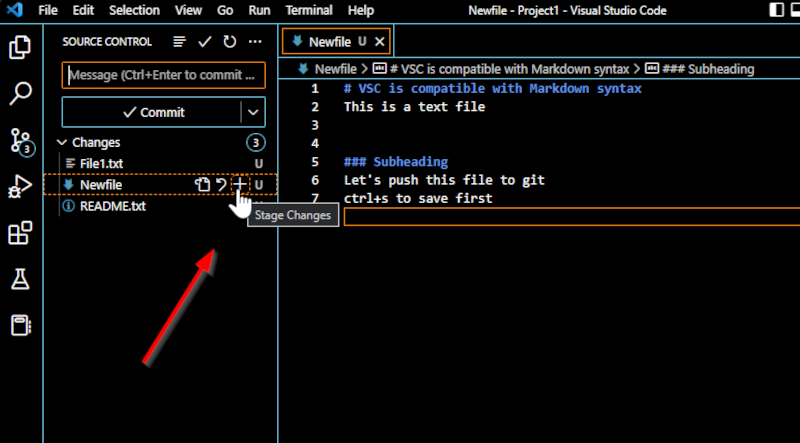
Once you initialize or clone, the contents of the open project folder will appear. You can start working on your project now, Ctrl+s to save progress, and stage changes by clicking on the plus sign next to your file.
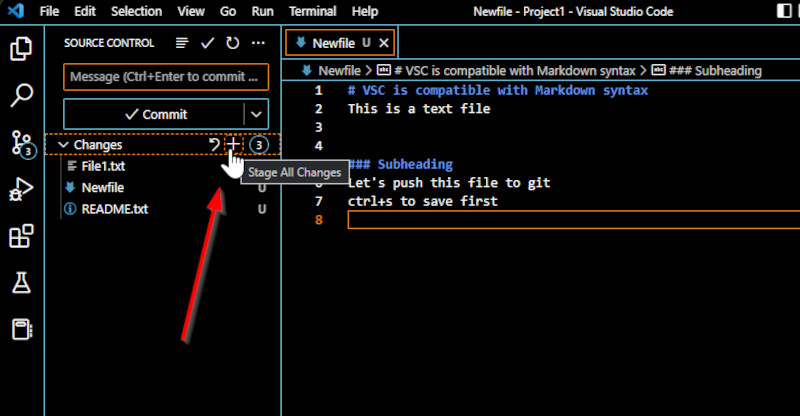
You can also stage all changed files together by clicking on plus sign next to Changes.
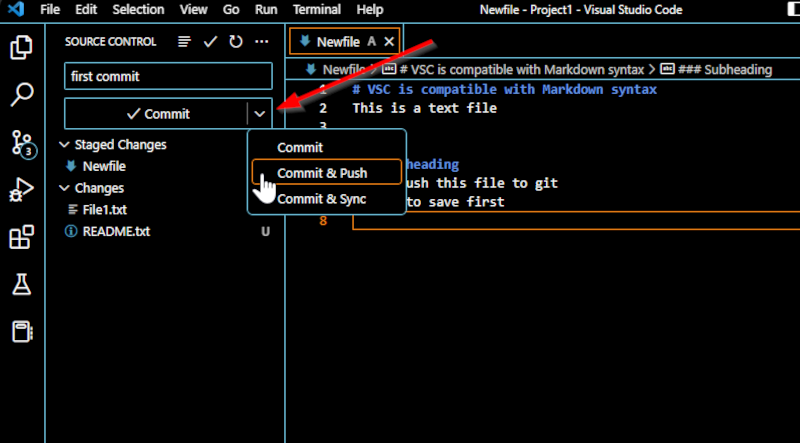
You can now either first Commit and then Push the staged changes or do both steps together by clicking on the dropdown menu.
Further Reading
Jupyter: interactive web-based multi-kernel DEGetting started with JupyterLab on a local machine
Getting started with Jupyter Notebook on HPC systems
Sharing Jupyter-based reproducible pipline via MyBinder
Python programming environment(s)
R programming environment(s)
MODULE 05: Introduction to Programming

