
DataScience Workbook / 07. Data Acquisition and Wrangling / 3. Data Wrangling: ready-made apps
Introduction
This section provides a highly verbose guide for the contents of the ISUgenomics/data_wrangling ⤴ GitHub repository.
data_wrangling repo
The data_wrangling repo collects ready-made mini-apps for popular tasks in data processing.
Most of the apps are developed in Python3 programming language.
In the data_wrangling ⤴ repo, each application is placed in a separate directory for tidy organization.
Each folder contains:
- the python script (.py) of the application
- the example inputs
- the documentation in the README.md file, including some usage variations (sample commands that run the program in different option configurations)
All the applications have a built-in set of options provided as in-line arguments from the command line. Thanks to that, there is no need to modify source code by the user (e.g., to replace input filename or tune params). Also, it makes the apps more universal, comprehensive, and robust.
More advanced (multi-purpose or multi-options) applications have a built-in logger which reports the analysis progress with the details depending on the selected verbosity level.
Environment setup
The applications are developed in Python programming language and requires importing several libraries providing useful ready-made functions and objects handling complex data structure. Thus, to have the apps working on your (local or remote) machine, first you have to set up the environment.
Considering you will be using various applications that require different dependencies, you need neat way to manage them. A good choice is Conda ⤴ environment management system that runs on all: Windows, macOS, and Linux.
If you are not already using Conda, go to the Basic Developer Libraries ⤴ tutorial for a step-by-step guide on how to set up the environment manager on your target computing machine. If you have a Mac with a dual processor (Arm64 and Intel’s x86-64) you can find dedicated setup instructions in section Install Basic Developer Tools ⤴ of the Installations on MacBook Pro ⤴ tutorial.
Python Setup
To run the applications collected in the data_wrangling ⤴ repo, you will need a computing machine with Python installed.
on the HPC cluster
If you want to use the HPC infrastructure, then usually various versions of Python are pre-installed and available to load using module system.
Use the following command to display Python versions:
module avail python
Then, load the selected variant:
module load python/python-3.9
on your local machine
The simplest way to check if you have Python already pre-installed on your local machine is to run in the terminal window the following command:
python --version
or
python3 --version
If the returned value will be something like Python 3.8.9, you are good to getting started with data_wrangling apps. Note that python in version 3.x is required.
Otherwise, if you receive an error message command not found, you will need to install Python. You can make up for this step by following the hands-on tutorial provided in section Python Programming Environment(s) ⤴: Local Python setup on your computing machine ⤴.
Conda Setup
Conda is an open-source package management system and environment management system for installing and managing packages and dependencies in Python and other programming languages. Conda allows users to create and manage isolated environments for different projects or workflows, each with its own set of packages and dependencies.
Learn more about Conda basics in section 3. Manage Python environments ⤴ of the tutorial Local Python setup on your computing machine ⤴.
Test Conda installation
To test your Conda configuration, in the terminal window, run the command provided below:
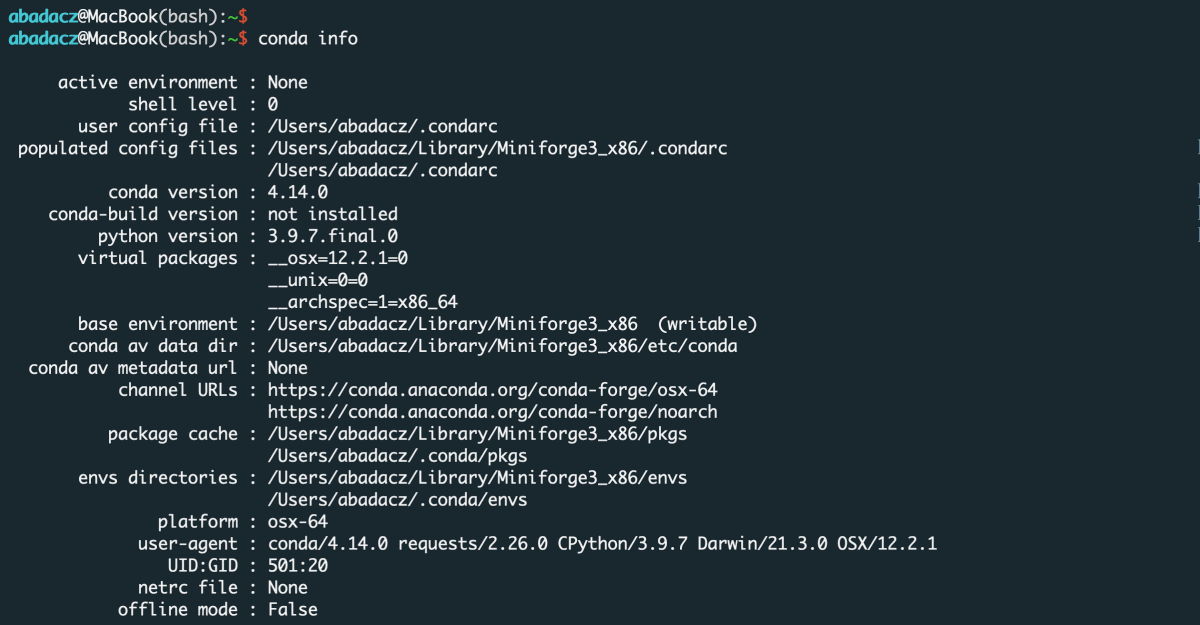
conda info
If the screen displays a message similar to the one in the image below, you are ready to create a new environment.
Otherwise, if a command not found error is thrown back, follow the instructions in the previous paragraph to install Conda correctly.
Create new Conda environment
To create a Conda virtual environment, type conda create followed by the name [here: data_wrangling] of the new env along with the -n argument. Further you can provide a list of modules to install. In this case, let’s initialize the environment for python version 3.9.
conda create -n data_wrangling python=3.9
Activate existing Conda environment
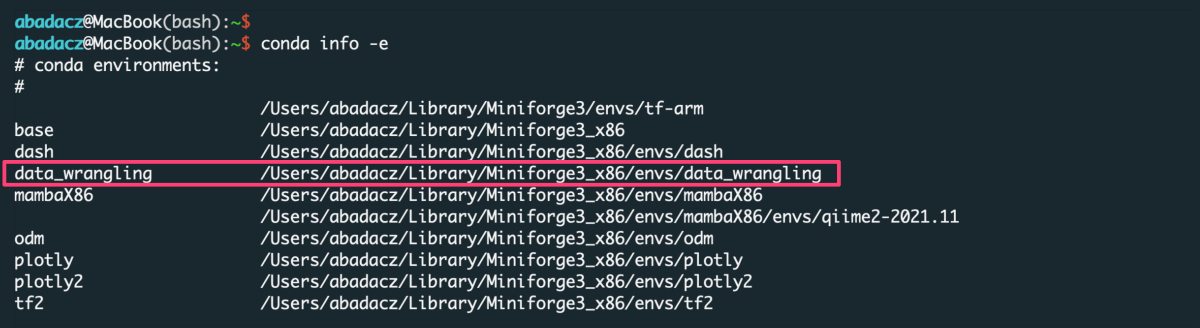
You do NOT need to create the new environment each time you want to use it with another application from the data_wrangling ⤴ repo. Once created, the env is added to the list of all virtual instances managed by Conda. You can display them with the command:
conda info -e
The selected environment can be activated when you need it with the conda activate command, followed by the name of the env:
conda activate data_wrangling

Once the environment is active, you can see its name preceding the prompt.
Install new dependencies within environment
Once environment of your choice is activated, you can install new dependencies required by the selected application. Generally, you can try to install modules with the conda install {module=version} command. However, since we initialized the data_wrangling environment with Python=3.9, we can also install modules using pip install {module==version}, as follows:
pip install pandas
pip install numpy
pip install openpyxl
Note that if you do not indicate the version of the module you are installing, the latest stable release will usually be installed.
When you install by
conda, assign the module's version using a single equals sign =. When you install by
pip, assign the module's version using a double equals sign ==.
Some applications may have additional requirements listed in the corresponding tutorial. When necessary, you can install them in the conda environment using the pip command.
Hands-on tutorials
Right here, in the Data Science Workbook: 07-DataParsing/03-DATA-WRANGLING-APPS section, you can follow the hands-on tutorials to learn how to run the ready-made applications using example datasets and further employ them to support your own research.
Browse available tutorials in the Further Reading paragraph (just below).